In this guide, we will learn how to deploy an Nginx custom website on Kubernetes With a container image for AWS ECR.
ECR stands for Elastic Container Registry, it is a container registry service fully managed by AWS which makes it easier to store, manage, and deploy container images. Integration with AWS services, high availability, security, and scalability are the main features of ECR.
Before starting the tutorial make sure you have the following requirements in your system:
- Minikube
- Virtualbox - We are going to start minikube with VirtualBox driver.
- Nginx image.
- AWS CLI is installed and configured.
Step 1: Before pushing an image to a repository, you must create an ECR repository in AWS. Go to service and search for ECR it will direct you to the ECR repository. Press the Create Repository button and create a new repository, set the repository as private, give a name for the repository and press Create Repository button at the bottom. Now return to the ECR dashboard you can see a new repository created.
Step 2: Log in to the ECR registry using the command:
aws ecr get-login-password --region <your-region> | docker login --username AWS --password-stdin <your-ecr-repo-url>Specify the region and ECR repository URL in the above command and run the command below to create a Kubernetes secret with the ECR registry authorization token.
kubectl create secret generic ecr-registry \
    --from-file=.dockerconfigjson=${HOME}/.docker/config.json \
    --type=kubernetes.io/dockerconfigjson
If the session logout or the token expires you need to change the authentication token in the ecr-registry file to run the below commands.
kubectl create secret generic ecr-registry \
    --from-file=.dockerconfigjson=${HOME}/.docker/config.json \
    --type=kubernetes.io/dockerconfigjson \
    --dry-run=client -o yaml > ecr-registry.yaml
This command creates a new file ecr-registry.yaml with the new authentication token created in the ~/.docker/configure.json directory. Now you have to run the ecr-registry.yaml file to update the token inside ecr-registry. Run the command below to update the token.
kubectl apply -f ecr-registry.yamlStep 3: Tag the Docker image with the repository URL to identify which image we are going to push, to tag the image use the command:
docker tag <image-name> <your-ecr-repo-url>:<tag-name>Step 4: After tagging push the image to ECR and it will be available for deployment, to push the image use the command:
docker push <your-ecr-repo-url>:<tag-name>Now, check inside the ECR repository you created if the image is uploaded, if uploaded follow the next step.
Step 5: Now, start minikube with the VirtualBox driver using the command given below.
minikube start --driver=virtualboxTo verify if it's working properly run the command:
minikube statusIf you get the following output you are good to follow the next step.
minikube
type: Control Plane
host: Running
kubelet: Running
apiserver: Running
kubeconfig: Configured
Step 6: If you don't have aws-iam-authenticator in your system install it using the command given below.
curl -o aws-iam-authenticator https://amazon-eks.s3.us-west-2.amazonaws.com/1.21.2/2021-07-05/bin/linux/amd64/aws-iam-authenticator

chmod +x ./aws-iam-authenticator

sudo mv ./aws-iam-authenticator /usr/local/bin/aws-iam-authenticator
AWS IAM Authenticator is a tool that allows you to authenticate to your AWS ECR using your IAM credentials. It allows you to use your user accounts and roles to authenticate access to your ECR repository.
You also need to attach the policy given below to your user to get access to ECR.
AmazonEC2ContainerRegistryFullAccessStep 7: Create a YAML file for deploying the Nginx image for ECR.
apiVersion: apps/v1
kind: Deployment
metadata:
  name: ecr-deployment
spec:
  replicas: 1
  selector:
    matchLabels:
      app: nginx
  template:
    metadata:
      labels:
        app: nginx
    spec:
      containers:
      - name: my-container
        image: <image-url>
      imagePullSecrets:
      - name: ecr-registry
In the above file provide your image-URL in the ECR repository and specify the secret name you created in step 2.
Step 8: Now apply the YAML file to create the deployment, and run the command for deploy:
kubectl apply -f <file-name>.yamlBy running this command your Kubernetes deployment should now be able to download the Nginx image from ECR and deploy it.
You can get the deployment status using the command given below it will show if the image is deployed or not.
kubectl get deploymentsIf it's deployed you will get an output as given below.

You can check if nginx is running properly by searching it in the browser with minikube IP and port 32000. To get the minikube IP run the following command:
minikube ipTo access the minikube dashboard, run the command given below its will display the dashboard in your browser as shown below.
minikube dashboard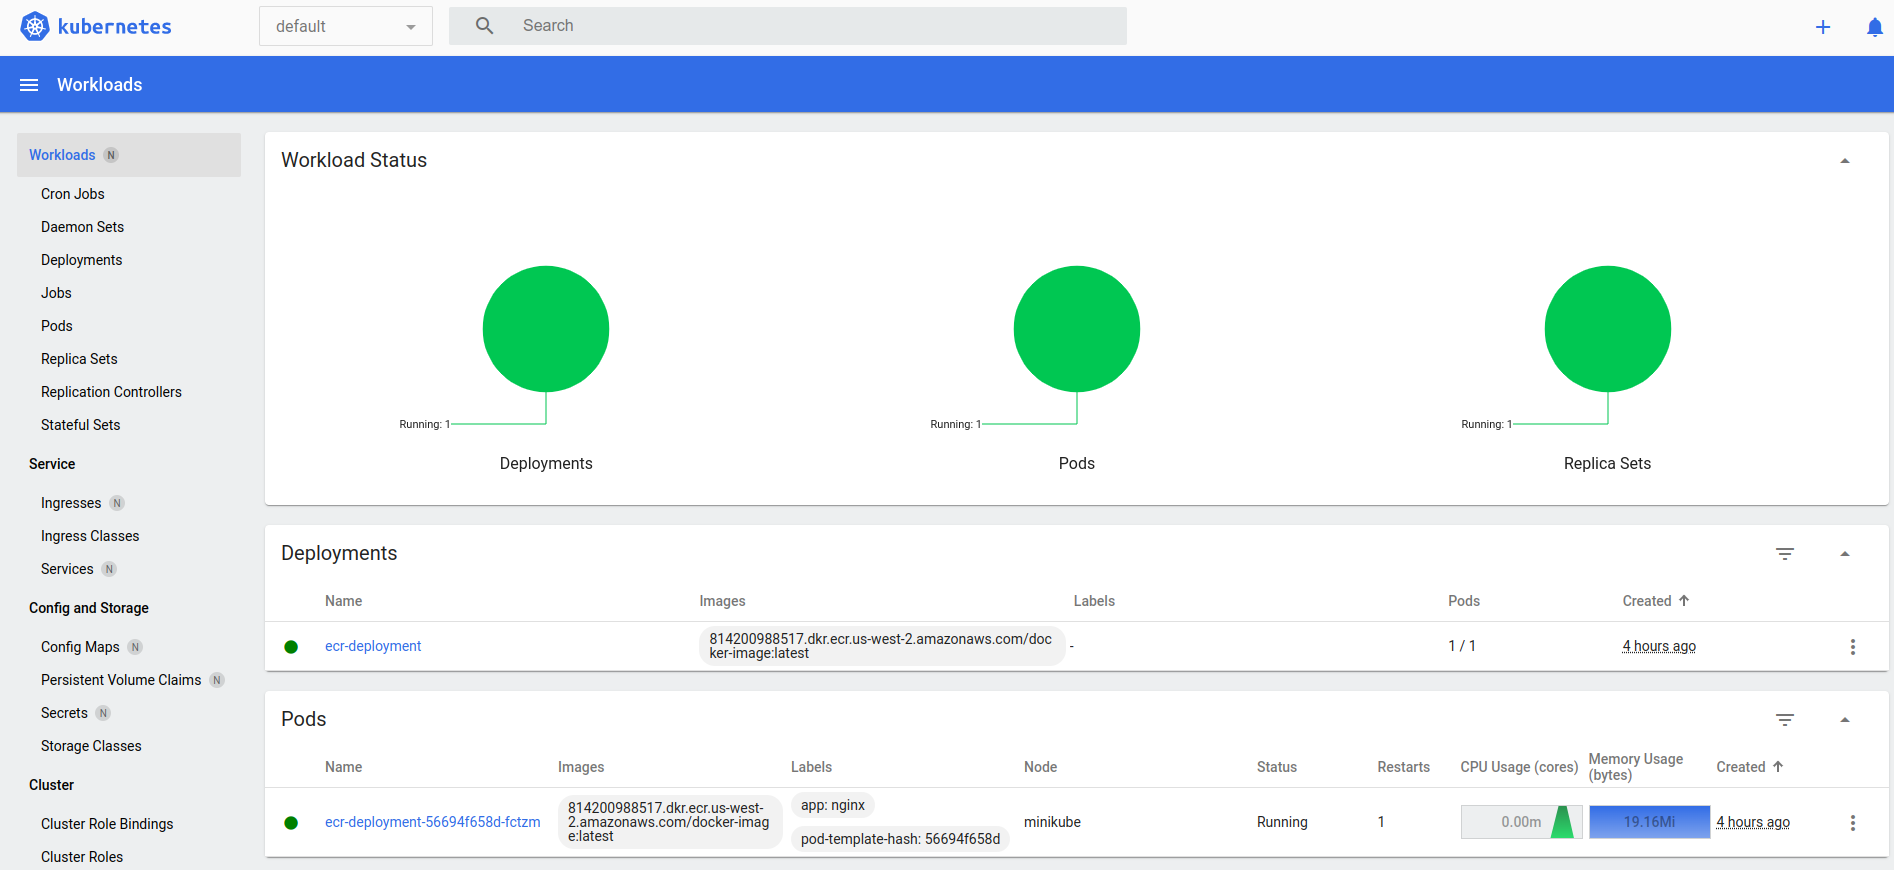
Note:Kubernetes certificationsLinux Foundation coupons