
In this blog, we will see how to backup and restore etcd on the kubeadm cluster.
Backup ETCD on the Kubeadm Cluster
First, let's see how to take backup of etcd, follow the below steps to backup etcd.
To take a backup of etcd, you need etcdctl installed in your controller node. To install etcdct, run the command below
sudo apt install etcd-clientOnce you have installed etcdctl, run the command below to take a backup of etcd.
ETCDCTL_API=3 etcdctl    \
  --endpoints=<etcd endpoint> \
  --cacert=<trusted-ca-file-location> \
  --cert=<cert-file-location> \
  --key=<key-file-location> \
  snapshot save <backup-file-location>
To get the locations of files specified in the above command, check the etcd manifest file, to view the etcd manifest file, use the command given below
cat /etc/kubernetes/manifests/etcd.yaml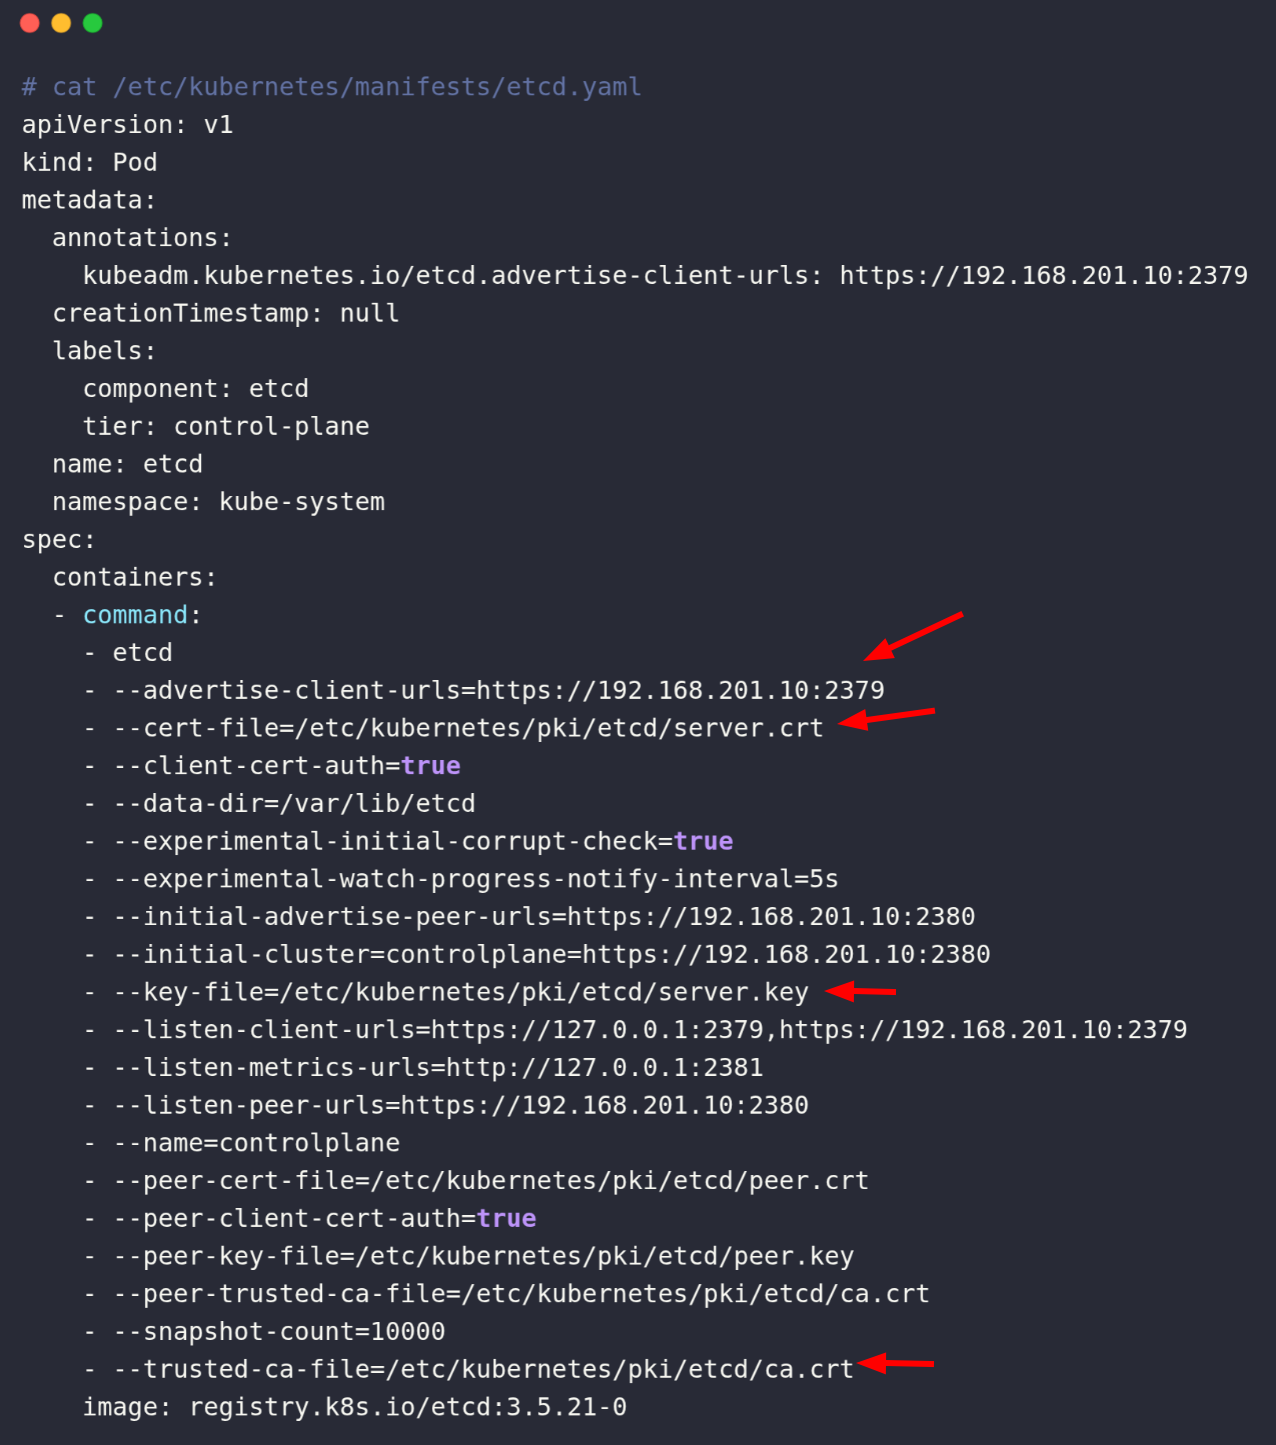
By using the file location from the above file, my command will be
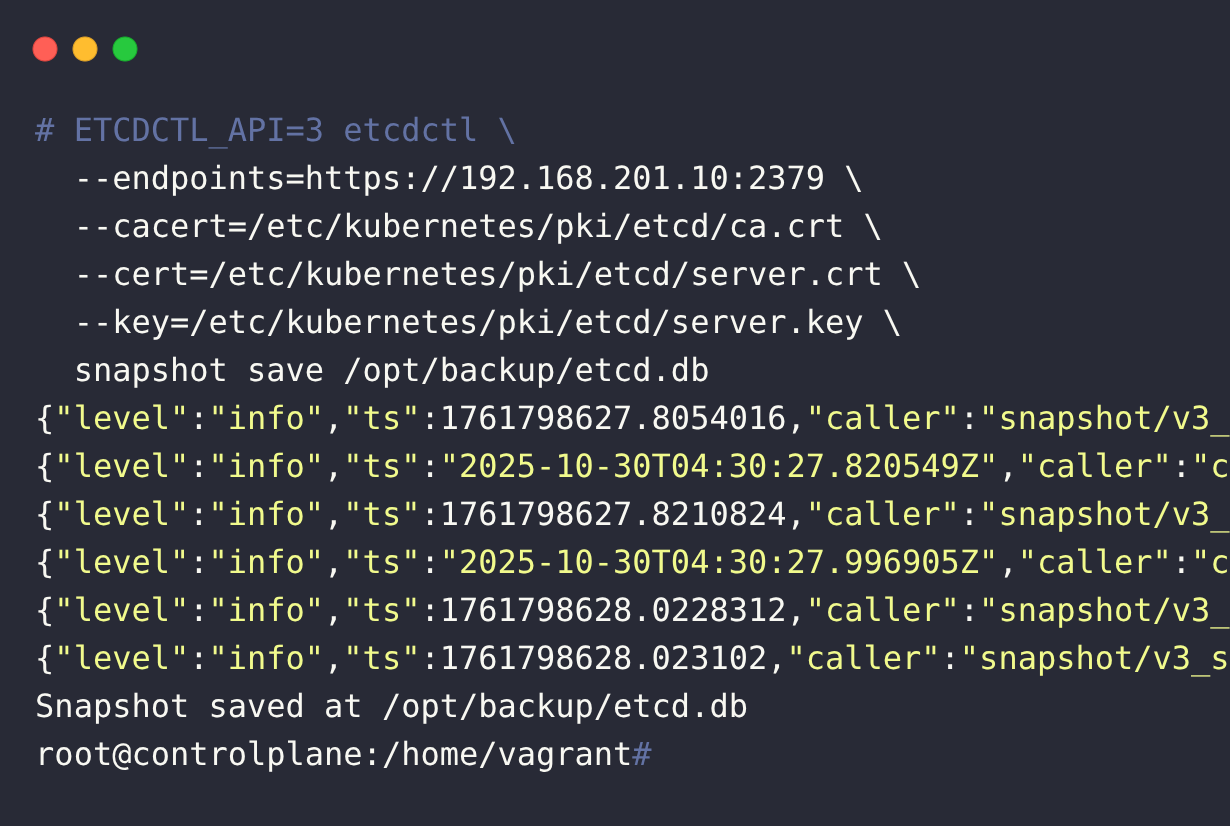
ETCDCTL_API=3 etcdctl   \
  --endpoints=https://192.168.201.10:2379  \
  --cacert=/etc/kubernetes/pki/etcd/ca.crt  \
  --cert=/etc/kubernetes/pki/etcd/server.crt  \
  --key=/etc/kubernetes/pki/etcd/server.key
  snapshot save /opt/backup/etcd.db
/optbackup/etcd.db is the location where I specify to store the snapshot.
By running the backup command, you will get the following output
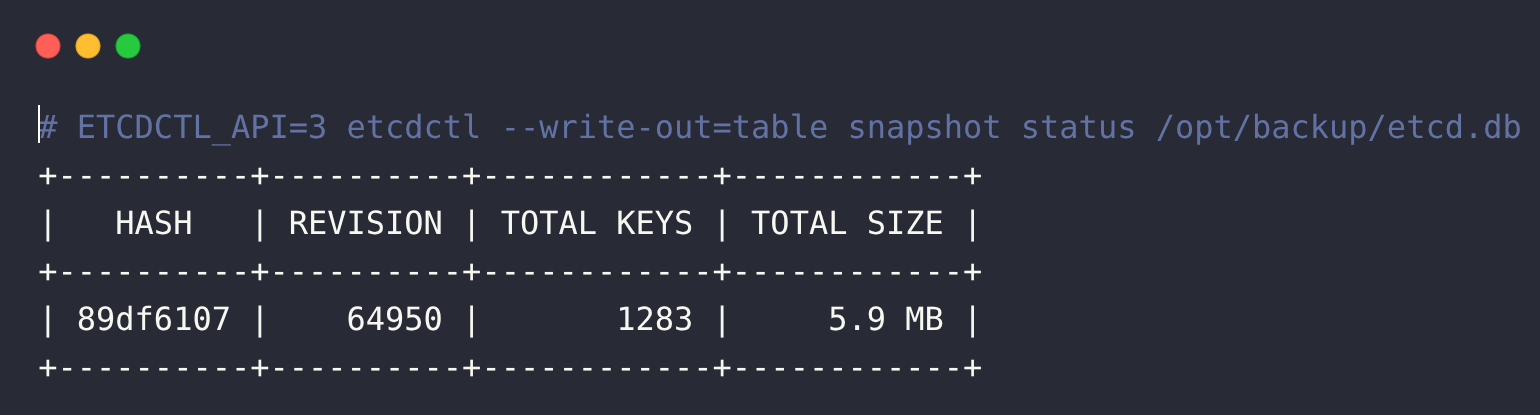
Verify the snapshot using the command
ETCDCTL_API=3 etcdctl --write-out=table snapshot status /opt/backup/etcd.dbYou will get the following output
How to Restore ETCD Backup on the Kubeadm Cluster?
To restore the backup etcd snapshot run the following command
ETCDCTL_API=3 etcdctl \
  --data-dir /opt/etcd \
  --endpoints=https://192.168.201.10:2379 \
  --cacert=/etc/kubernetes/pki/etcd/ca.crt \
  --cert=/etc/kubernetes/pki/etcd/server.crt \
  --key=/etc/kubernetes/pki/etcd/server.key \
  snapshot restore /opt/backupetcd.db
By running the restore command, you will get the following output
{"level":"info","ts":1761794802.4402878,"caller":"snapshot/v3_snapshot.go:306","msg":"restoring snapshot","path":"/opt/backup/etcd.db","wal-dir":"/opt/etcd/member/wal","data-dir":"/opt/etcd","snap-dir":"/opt/etcd/member/snap"}
{"level":"info","ts":1761794802.5332155,"caller":"mvcc/kvstore.go:388","msg":"restored last compact revision","meta-bucket-name":"meta","meta-bucket-name-key":"finishedCompactRev","restored-compact-revision":51334}
{"level":"info","ts":1761794802.5497634,"caller":"membership/cluster.go:392","msg":"added member","cluster-id":"cdf818194e3a8c32","local-member-id":"0","added-peer-id":"8e9e05c52164694d","added-peer-peer-urls":["http://localhost:2380"]}
{"level":"info","ts":1761794802.558573,"caller":"snapshot/v3_snapshot.go:326","msg":"restored snapshot","path":"/opt/backup/etcd.db","wal-dir":"/opt/etcd/member/wal","data-dir":"/opt/etcd","snap-dir":"/opt/etcd/member/snap"}
root@controlplane:/home/vagrant#
You can also specify the data directory for restoring etcd using the --data-dir flag. /opt/etcd is the data directory where I am restoring etcd.
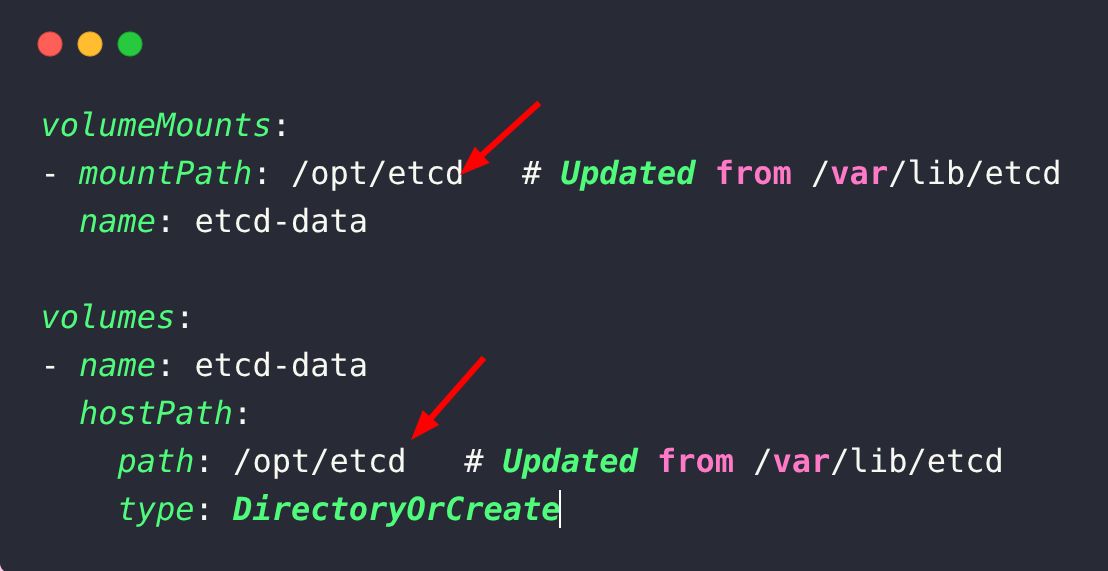
To use the data restored from etcd correctly, we need to change the default path of its volumeMounts and Volumes in the etcd.yaml file to the path of the backup.
Modify /etc/kubernetes/manifests/etcd.yaml accordingly.
Once you update the etcd configuration file, the Kubernetes static pod mechanism will detect the change and restart the etcd pod with the new configuration settings.
Conclusion
In summary, we have learned about how to take backup and restore on Kubernetes.
I believe this blog has given a decent understanding of taking backups and restoring on Kubernetes.